How to Waterproof Metal Roofing? A Step by Step Guide (2026)
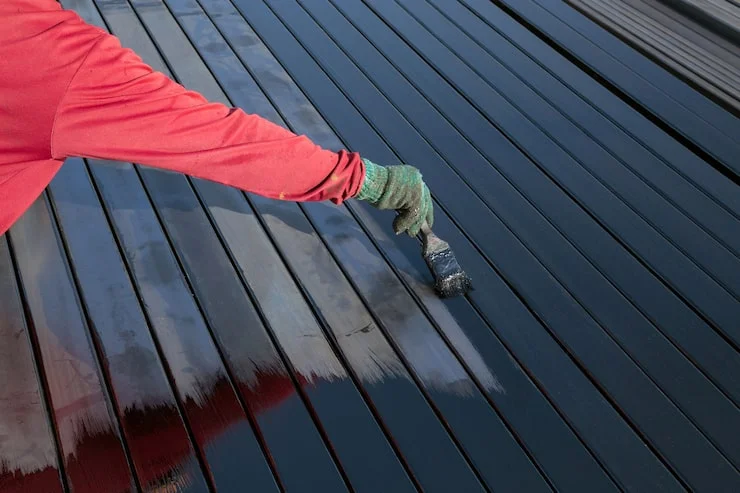
Learning how to waterproof metal roofing? comes down to five things: clean the surface, tighten and replace failed fasteners, seal the seams and flashing, treat any rust, and apply a liquid waterproof coating over the whole roof. Metal itself sheds water well. The leaks almost always start at the joints, screws, and flashing, which is where your work should focus.
We are The Orlando Roofing, a licensed and insured roofing company at 121 S Orange Ave, and we seal, coat, and repair metal roofs across Central Florida. Below is the full process, the sealants and coatings worth using, what the job costs, and the point where a professional should take over.
Why Metal Roofs Leak
Before learning how to waterproof metal roofing, it helps to know where the water actually gets in. A metal panel is waterproof on its own. The gaps around it are the problem:
- Fasteners. Exposed screws have rubber or EPDM washers, and they dry out and shrink in the Florida sun, usually within 10 to 20 years. Once a washer fails, every screw hole becomes an entry point.
- Seams and overlaps. Panels expand and contract with heat, which slowly works the overlaps loose and can pull water sideways between them.
- Flashing and penetrations. Chimneys, vents, skylights, and wall junctions are the weakest points on any roof.
- Rust. On steel panels, rust eats through from the surface down and eventually opens pinholes.
- Low slope and ponding. Water sitting on a flat section finds any weakness it can.
Sealing all five areas is the heart of metal roof waterproofing, and skipping them means a coating will only hide the problem.
How to Waterproof Metal Roofing in 5 Steps
Work on a dry day with temperatures above 50 degrees, out of direct sun where possible, and with no rain in the forecast for at least 24 hours.
Step 1: Inspect and Clean the Roof
Start with a full inspection. Look for rust, loose or missing screws, gaps in the flashing, and separated seams. Sweep off leaves and debris, then wash the roof with a surface cleaner to remove dirt, grease, chalk, and mildew, and rinse it well. Any coating or sealant you apply later will only bond to a clean, dry surface, so let the roof dry completely before moving on. On an older roof, check the gutters and downspouts at the same time.
Step 2: Fix Fasteners and Flashing
Most metal roof leaks trace back to screws and flashing. Go over every fastener and tighten the loose ones. Replace every rusted, stripped, or spinning screw with a new metal roofing screw and a fresh rubber sealing washer, and step up one size if the hole has widened. Then seal the details. Run butyl tape or seam tape along open seams and laps, and apply a quality waterproof sealant for metal roof flashing where the roof meets a chimney, wall, vent, or skylight. Press seam tape firmly for a solid bond, and smooth any caulk so water runs off instead of pooling.
Step 3: Treat Rust Spots
Steel panels rust, aluminum does not. Scrape flaking rust back to bare metal with a wire brush or sandpaper, then apply a rust-inhibiting primer to the bare areas so the corrosion does not return. Skipping the primer is the most common reason a coating peels a year later. Badly rusted panels flexing underfoot or showing holes need replacement, not paint.
Step 4: Apply a Metal Roof Waterproof Coating
A liquid-applied metal roof waterproof coating forms a seamless membrane over the entire surface, sealing everything you repaired. Prime the roof first with a primer made for your coating, then apply the coating with a roller, brush, or sprayer in even, overlapping passes. Use two or three thin coats rather than one heavy one, and let each coat dry fully before the next. Coat over the seam tape and sealant as well so the whole roof becomes one continuous layer. Most systems need a day or two to fully cure. Our roof coating crew handles the full application if you would rather not do it yourself.
Step 5: Maintain and Monitor
A cured coating protects the roof, but it is not permanent. Clean the roof and clear the gutters once or twice a year, and check the sealant around the flashing and fasteners each spring for cracks or peeling. Catching a small failure early keeps water out of the decking below. A yearly roof maintenance visit does the same job with none of the ladder work.
Choosing a Waterproof Sealant for a Metal Roof
Sealants and coatings are two different products. Sealant, butyl tape, and caulk handle the details. Coatings cover the whole roof. The main coating types compare as follows.
| Coating type | Cost per sq ft (installed) | Strengths | Watch-outs |
|---|---|---|---|
| Acrylic | $0.50 to $3.00 | Affordable, reflective, strong UV resistance | Weak on ponding water, recoat about every 10 years |
| Silicone | $1.50 to $4.50 | Best against ponding water and UV, holds thickness | Attracts dirt, slippery when wet |
| Polyurethane | $1.50 to $4.00 | Tough, handles foot traffic and impact | Higher cost, needs careful prep |
| Liquid rubber | $1.50 to $2.50 | Flexible, easy to apply, good for DIY | Thinner build than silicone |
| Butyl tape / caulk | Sold by the roll or tube | Best for seams, laps, and fasteners | For details only, not full coverage |
For most Florida metal roofs, an elastomeric acrylic or silicone system works best when you are working out how to waterproof metal roofing for the long term. Silicone is the stronger pick where water sits on a low slope, and acrylic is the value option on a roof with good drainage. Whatever you choose, stay within one product family, because coatings often will not bond over a different chemistry.
How to Waterproof a Metal Roof With Holes
Holes need a repair, not just a coating. Liquid coating alone will not bridge an open gap and will fail within a season.
- Pinholes and screw holes: clean the metal, then fill with a metal roof sealant and cover with seam tape or a coating patch.
- Holes up to a few inches: cut a metal patch from matching material, bed it in sealant, fasten it, then tape and coat over the top.
- Rusted-through or large holes: replace the panel. Once rust has opened a hole, the surrounding metal is usually thin too.
After the repair is solid and dry, coat the whole area so the patch is sealed into the membrane. If you find several holes, the roof is telling you it is near the end of its life, and a roof replacement may cost less than repeated patching.
How to Waterproof a Metal Shed Roof
A shed is the easiest version of the job, and the same five steps apply on a smaller scale. Tighten or replace the screws, tape the seams and ridge, treat any rust, and roll two coats of liquid rubber or acrylic over the panels.
Pay extra attention to the ridge cap and the edges, since sheds often have thin panels and minimal flashing. Most shed roofs take a weekend and one or two five gallon pails. Check the inside for daylight before you start, because a shed with visible gaps needs patching first.
What Metal Roof Waterproofing Costs
Hiring out the job is the usual route, and professional metal roof coating in Florida generally runs $1.50 to $4.00 per square foot installed, depending on the coating, the amount of rust, and how easy the roof is to reach. A full elastomeric restoration typically lands between $2.00 and $5.00 per square foot and can add 10 to 20 years of service life, which is far cheaper than a full replacement. Doing it yourself cuts the labor, so materials for a small roof or shed often run a few hundred dollars.
Two things raise the price: heavy rust, which needs more prep and primer, and a steep or complex roof, which slows the work and calls for more safety setup.
When to Call a Professional
Part of the job is DIY friendly, and part of it is not.
How to Waterproof Metal Roofing Yourself
You can reasonably handle a shed, a carport, a low garage roof, or a small patch on a single story home, as long as you can work safely and the roof is structurally sound. Wear soft-soled shoes, never step on wet or frosty metal, walk over the fasteners where the panels are supported, and use a harness on anything steep.
Call a roofer when the roof is two stories or steep, when you see active leaks inside, when panels are rusted through or flexing, when the flashing needs rebuilding, or when the roof is under warranty, since the wrong coating can void it. A professional roof inspection also tells you whether coating is even the right answer, or whether a repair or new metal roof makes better sense.
Florida Notes Worth Knowing
Central Florida is hard on metal. Constant UV breaks down sealant faster than in cooler states, daily summer heat swings work fasteners loose through expansion and contraction, and high humidity speeds up corrosion on steel. Homes near the coast get salt air on top of it.
Two habits matter most when you waterproof metal roofing in Florida: reseal the fasteners and flashing before they fail, and schedule the coating work in the drier spring months rather than during the summer storm season. Low-slope and flat metal sections need extra attention, since standing water finds every weak spot. Our flat roofing page covers low-slope systems.
Conclusion:
Knowing how to waterproof metal roofing is mostly about preparation. Clean the surface, replace failing fasteners, seal the seams and flashing, prime any rust, and only then apply two or three thin coats of a quality coating.
Done properly, the work stops leaks, slows corrosion, and adds a decade or more to the roof. Done in a hurry over a dirty or rusted surface, it peels within a year. If your roof already leaks, or you are unsure which coating suits it, an inspection is the cheapest step you can take.